Update: This is no longer the latest version of the software. Find that here.
New in this Version:
- In-the-field addressing via two tact switches (works with the previously released I/O Shield, here).
- Address is stored in non-volatile EEPROM, so it is retained when power is lost to the Arduino.
- Addressing hardware allows full use of the pins (which is why I didn’t use the more conventional dip switch setup).
- Some of the variables were localized, since the sketch is now getting pretty complex.
The latest software can be downloaded here, you may also want to check out the release notes here.
How to Set the Address:
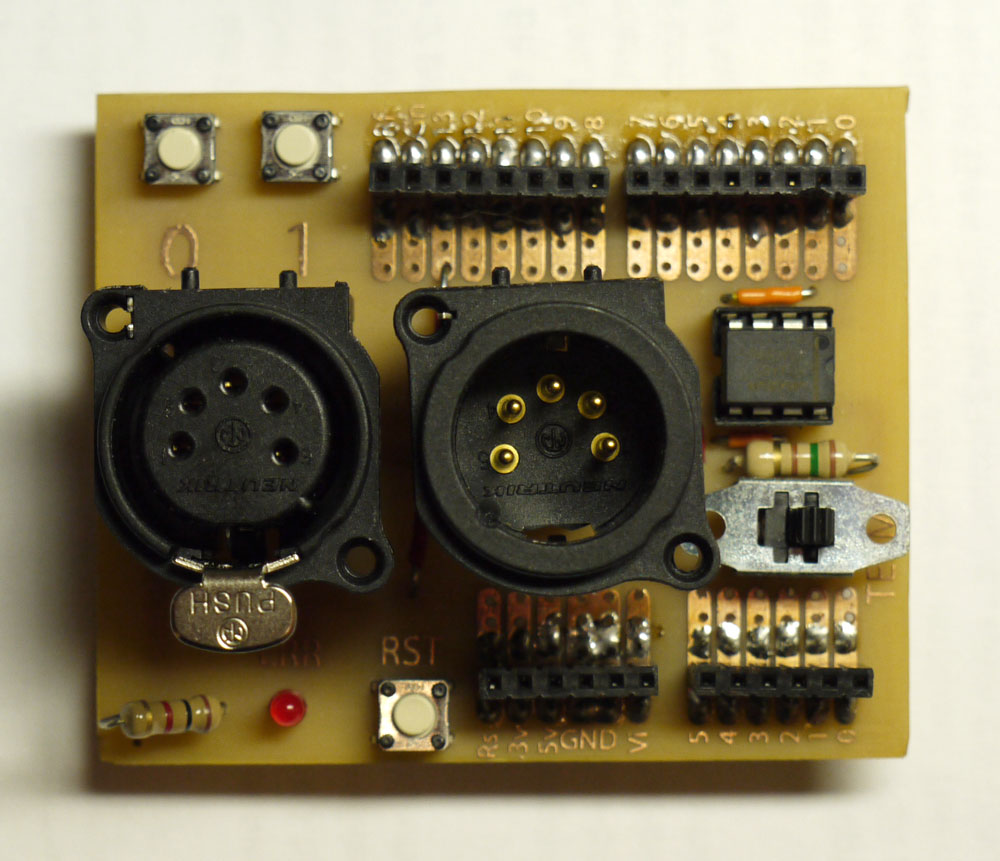
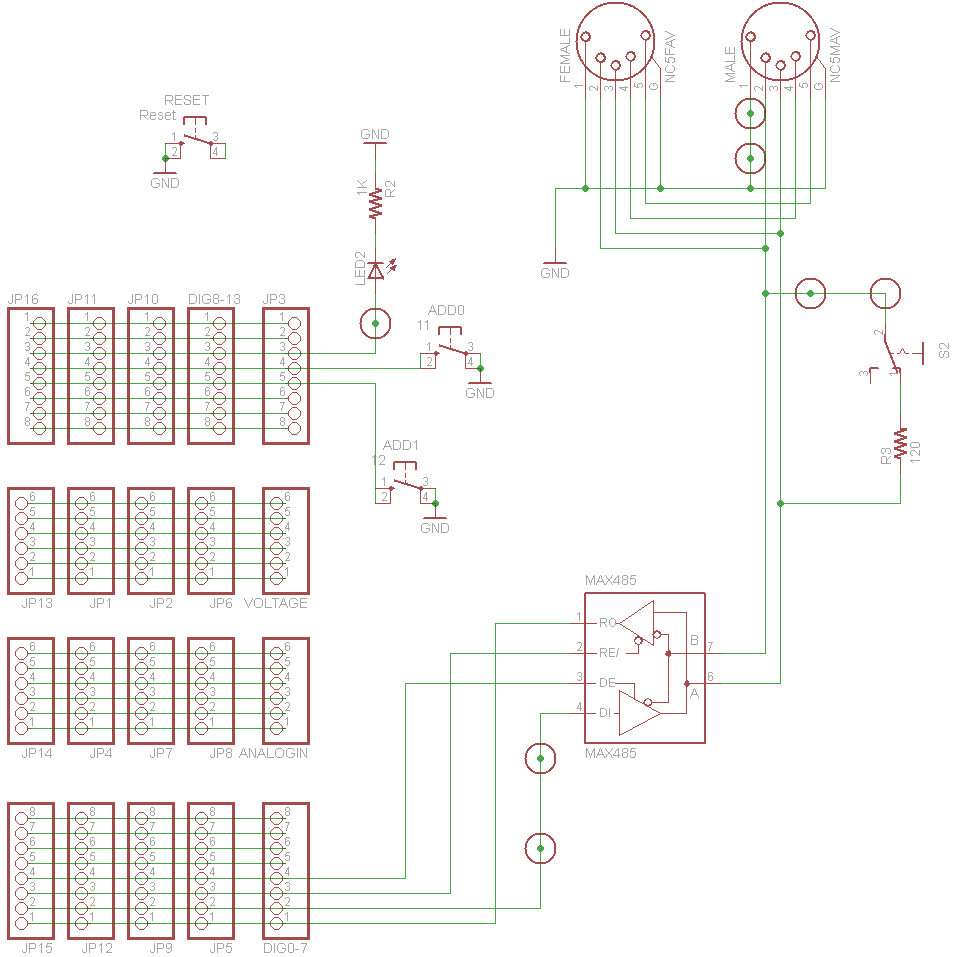
I’m going to assume you’ve built yourself a DMX I/O shield, if not, you can take a gander at the schematic and set it up on breadboard.
There are two tact switches on the shield, a ‘1’ switch and a ‘0’ switch.
If you press and hold both switches, then hit the reset button, the starting DMX address will be reset to dimmer 1. The pin 13 LED (marked as ‘ERR’ on the shield) will flash a few times in confirmation.
For other addresses, you’ll hold down either the 1 or 0 switch (but not both), then hit the reset switch. The pin 13 LED will light up and stay on. Then you’ll enter your desired address in binary, least significant digit first, by alternately hitting the 0 and 1 switch. As you enter each bit, the LED will turn off for a moment to confirm that bit was set. When all 9 bits are received, the ERR LED will flash a few times. If you make a mistake, just start over by holding down one of the switches and hitting reset.
An Example: let’s say we want a starting address of 246. 246 in binary is 011110110. You can get this number in couple of ways.
- Mathematically,
246 = 0*256+1*128+1*64+1*32+1*16+0*8+1*4+1*2+0*1
= 29 + 28+27+26+25+24+23+22+21+20 = 011110110
(Depending on how well you know your powers of 2, the above will be obvious or complete gibberish) - In Windows, by firing up the calculator, going to View>Scientific, entering “246”, and hitting the “BIN” radio button
- In Google, by entering “246 in binary” in the search box
- By looking it up in your familiar DMX dip switch chart, like this one here.
So thus far, the same process as addressing any other piece of equipment. Now, hold down the 1 or the 0 switch, and hit reset. The ERR LED will come on, signifying that we’re in addressing mode.
Now enter the above binary sequence, starting with the smallest number: hit the 0 switch, then the 1 switch, then 1, 0, 1, 1, 1, 1, 0. The LED will briefly turn off every time you hit a switch.
After all 9 bits are entered, the LED will flash several times. The board is now addressed to 246.
Another Example: Channel 131. Hold down the 0 or 1 switch, hit reset, enter 1, 1, 0, 0, 0, 0, 0, 1, 0.
Note: Once the address is set, the pins 11 and 12 may be re-assigned for any other use. That’s why I did it this way, rather than using a conventional dip switch, which would have taken up 9 pins on the board (I’d be lying if I said I wasn’t a little impressed by my own cleverness here). The pins are configured with internal pull-ups in setup() as:
[cc]
digitalWrite(pin0, HIGH);       //turns on the internal pull-up resistor for pin 11
pinMode(pin0, INPUT);           //sets pin 11 to input
digitalWrite(pin1, HIGH);       //turns on the internal pull-up resistor for pin 12
pinMode(pin1, INPUT);           //sets pin 11 to input
[/cc]
Pressing the switches grounds them, setting the pin to LOW. So, exercise caution when using the pins for anything that doesn’t like to be grounded, is the only caveat.
Known Bug: for some reason, sometimes when you hit the 0 or 1 switch it doesn’t take. I’ve programmed the LED to turn off briefly if the bit was successfully entered, so if you don’t see it go off, you’ll have to hit the switch again until it takes. I don’t know why it’s doing this, if you have some time to wade through the logic let me know why and I’ll update the code.
The Astute Reader Will Wonder: why we don’t enter 000000000 for the first address. True, DMX addresses actually run from 0 to 511, so dimmer 1 is actually listening to dmx address 0. I’ve seen gear that takes this into account and automatically adds 1 to your desired address, and gear that you subtract 1 from your desired address. Since there doesn’t seem to be any standard, I’ve opted to let the software do it for you because it’s easier.